.png)
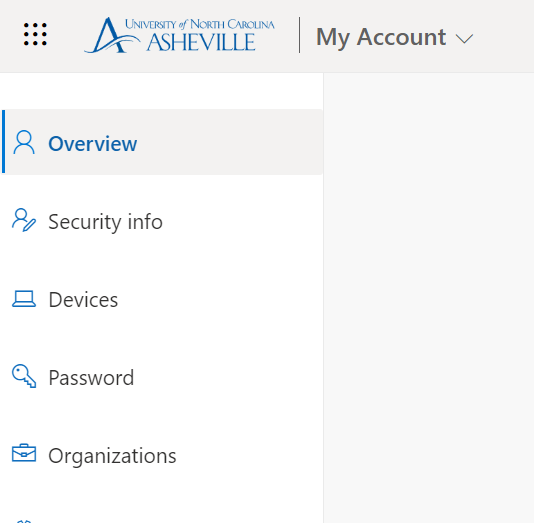
Manage / Add methods
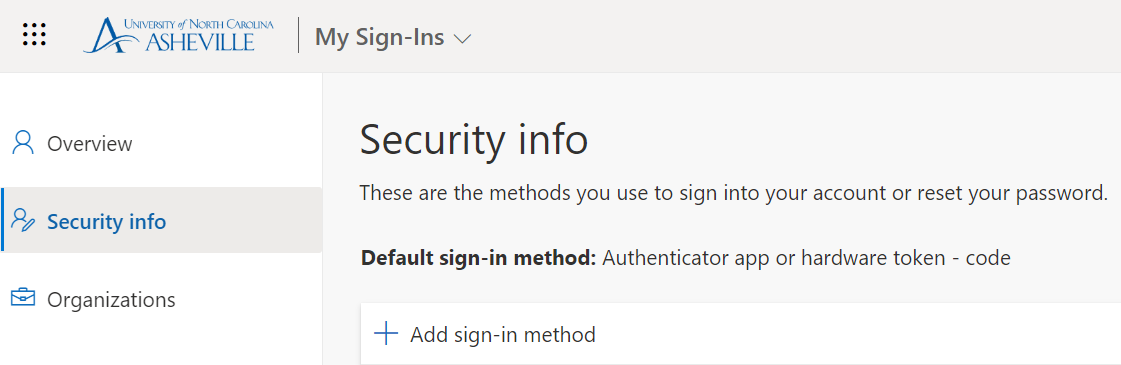
Visit https://aka.ms/mfasetup
Click on Security Info and click Add Sign In Method
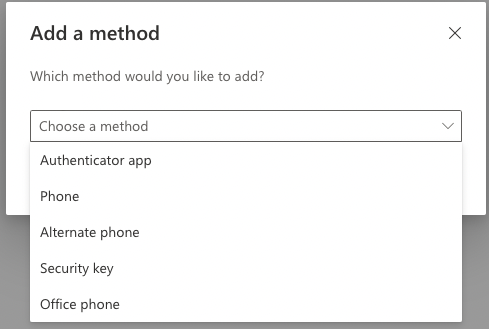
From the dropdown, pick the method you would like to use. While the Microsoft Authenticator app is the most convenient, you can also add cell and office phone numbers, hardware tokens (like Yubikey), or browser extensions!
Next follow the steps below for the type of method chosen.
Authenticator Apps
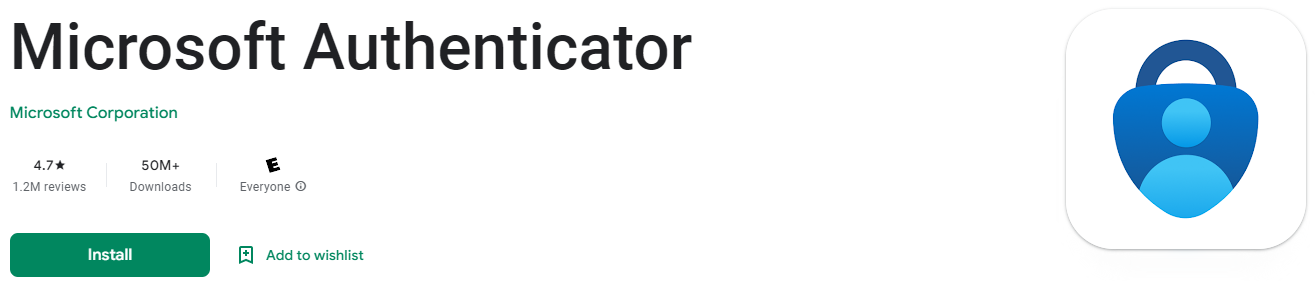
Do not pay for any authentication app. The Microsoft Authenticator app is totally free!
Apple iOS
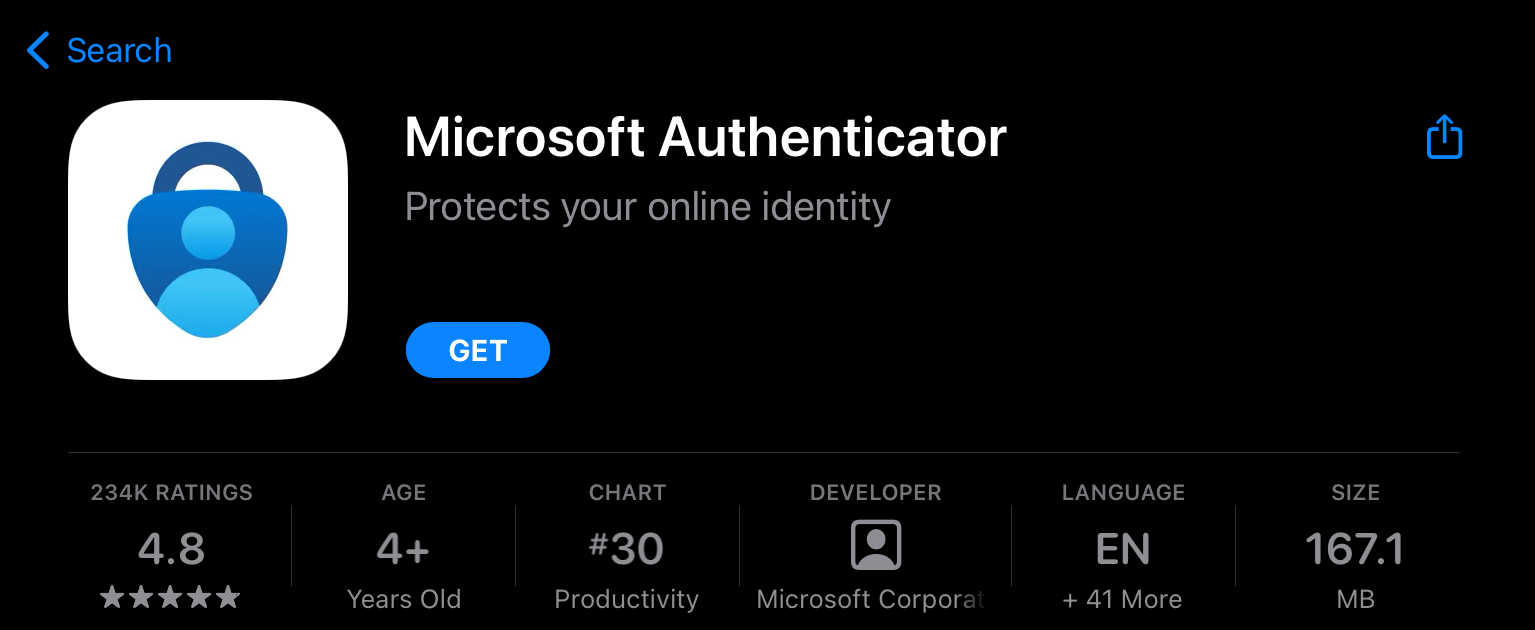
On your phone: iOS download click HERE
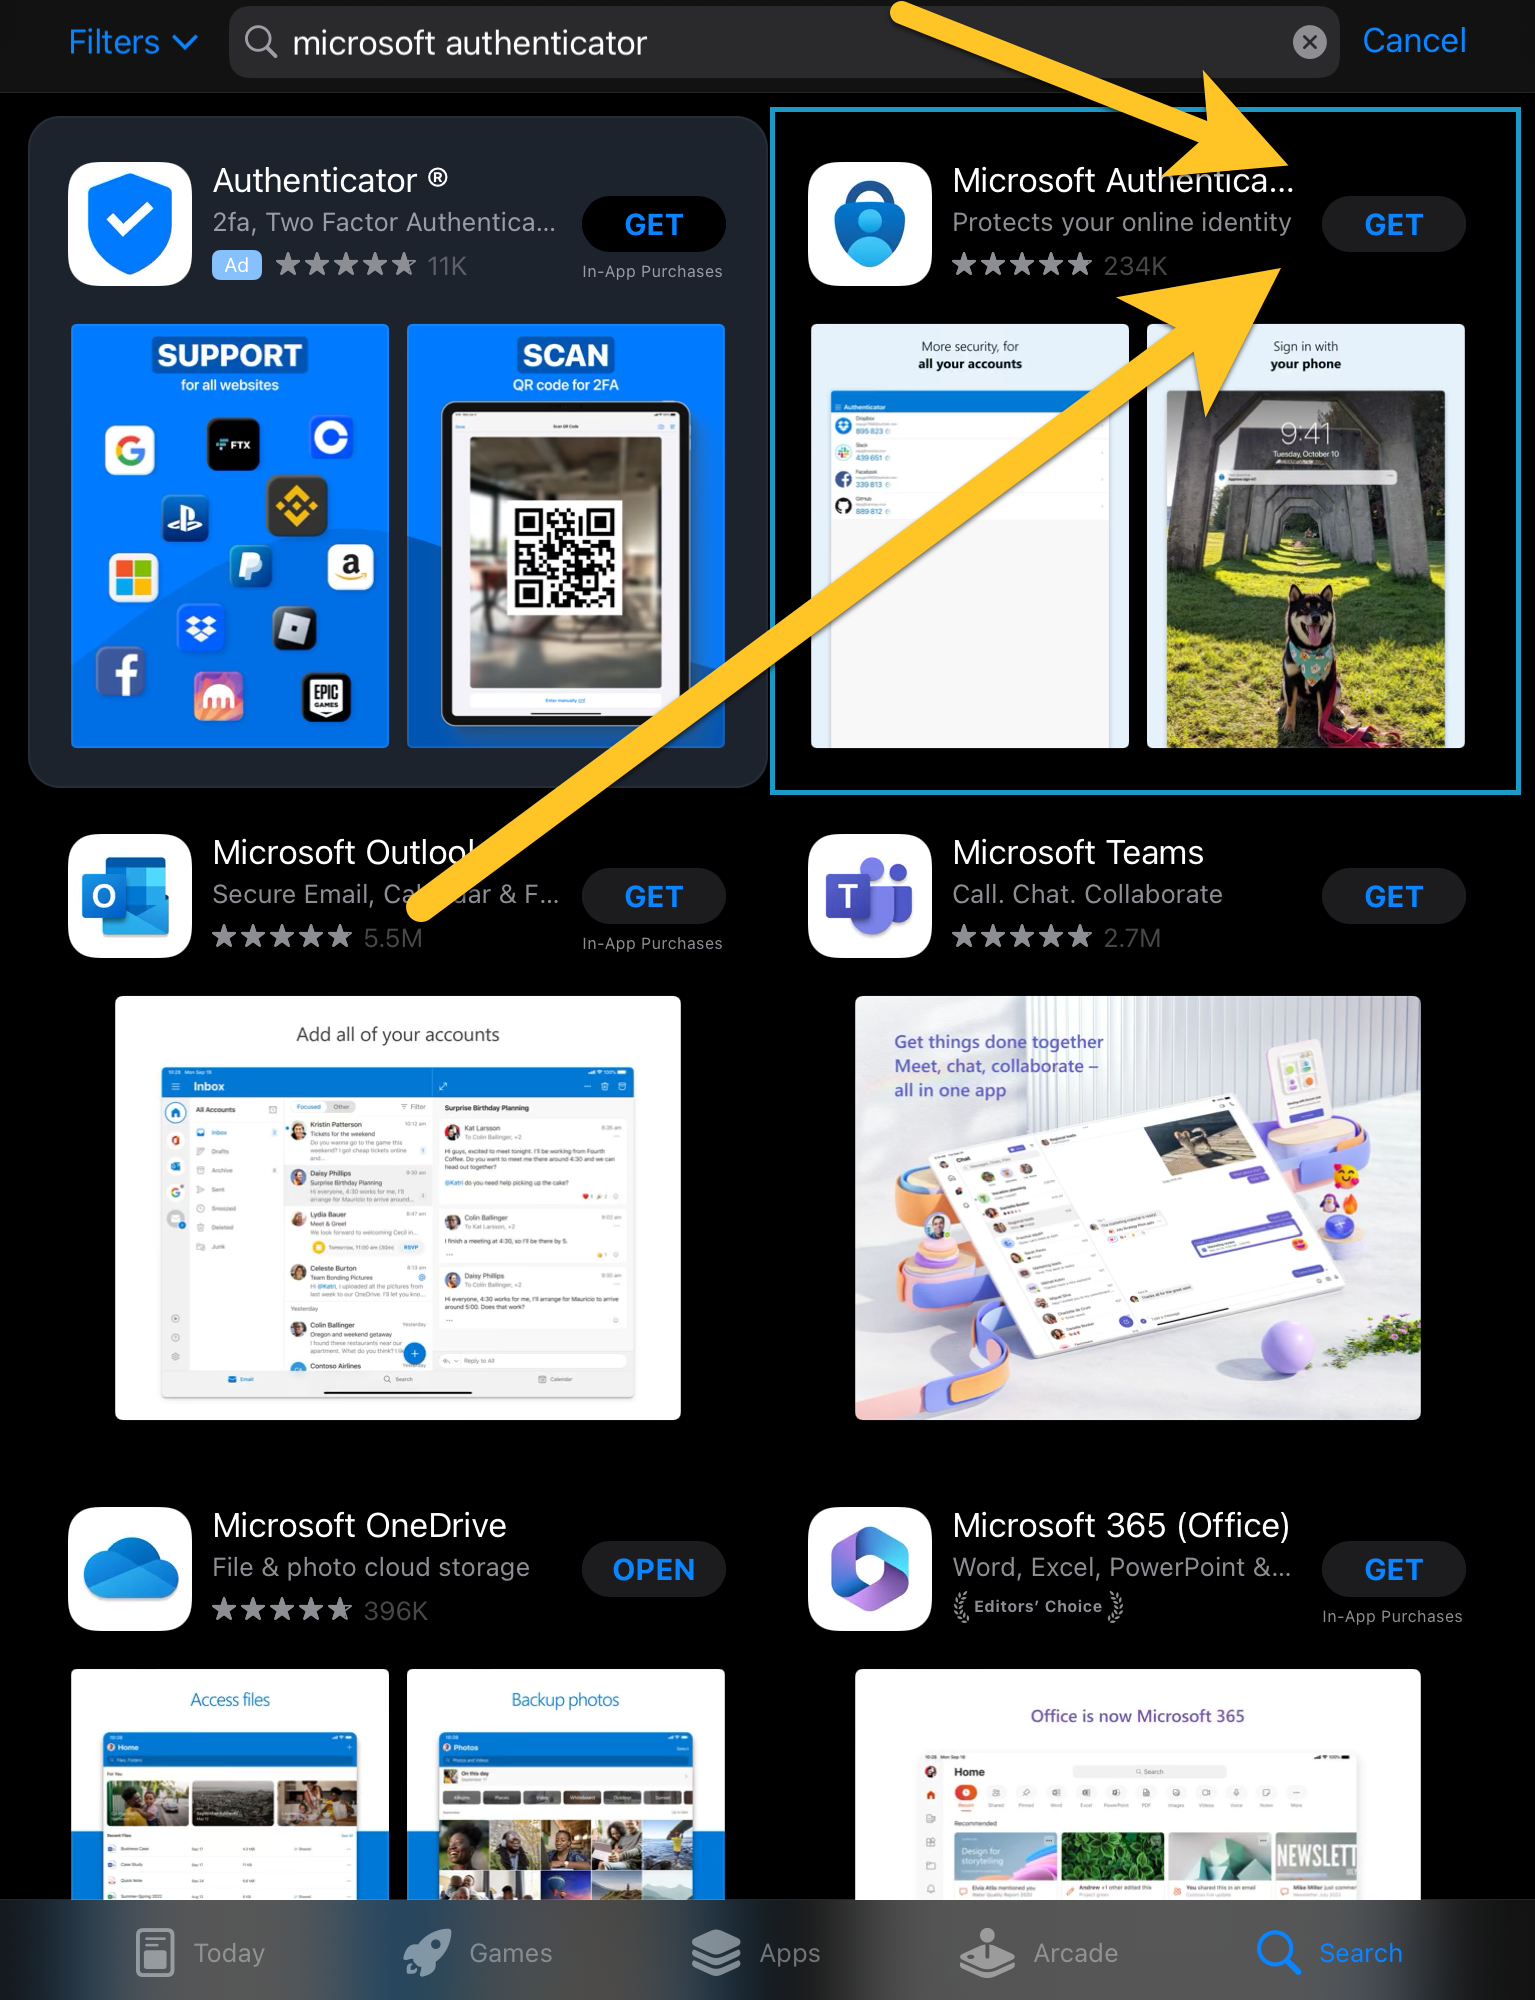
Tap Get to begin installing.
On your computer: After picking “Authenticator App” from the dropdown, the next window will ask if you would prefer to use the Microsoft Authenticator. This application will allow your phone to authorize access to your accounts.
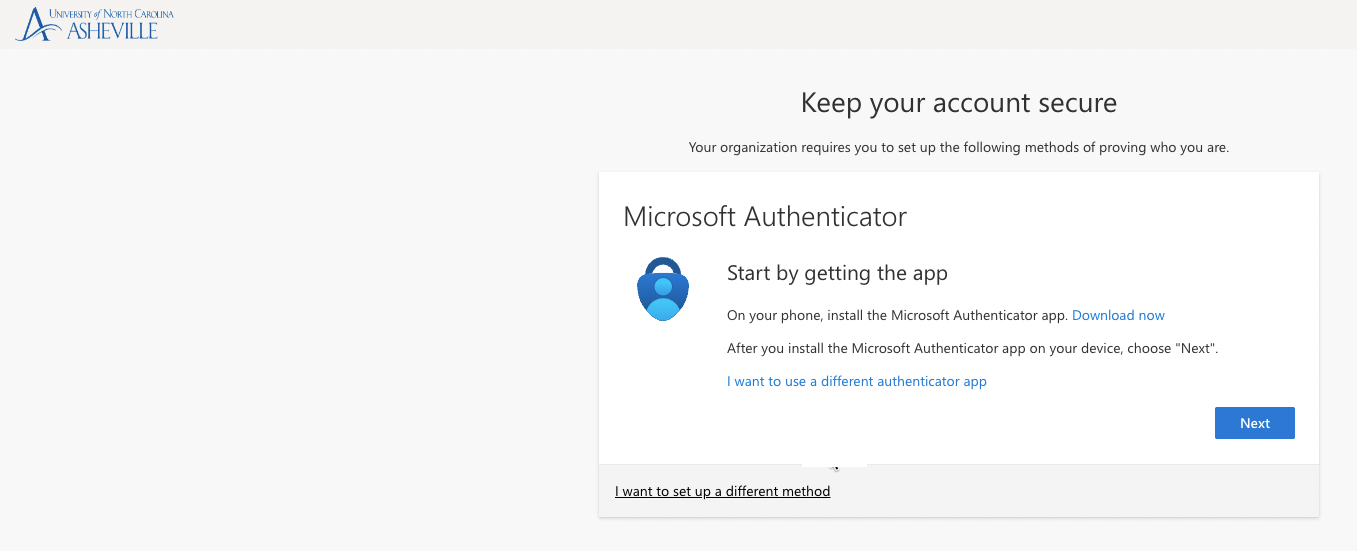
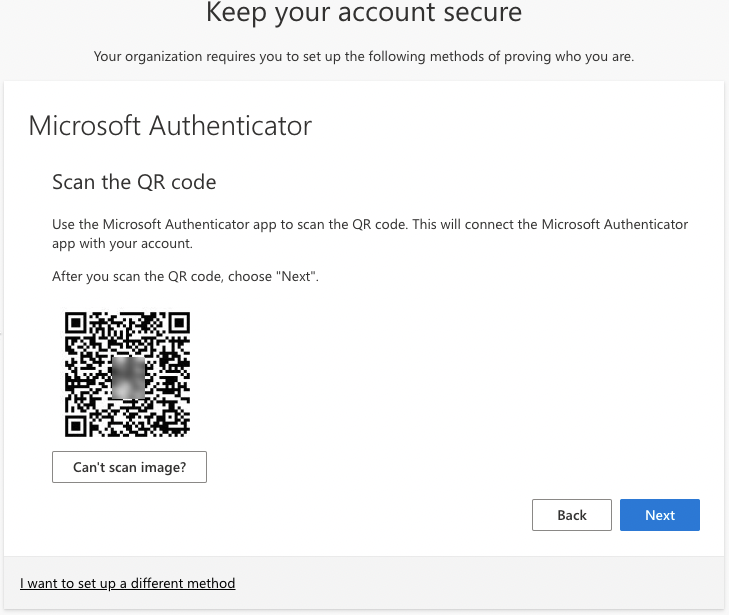
Click Next to begin setup.
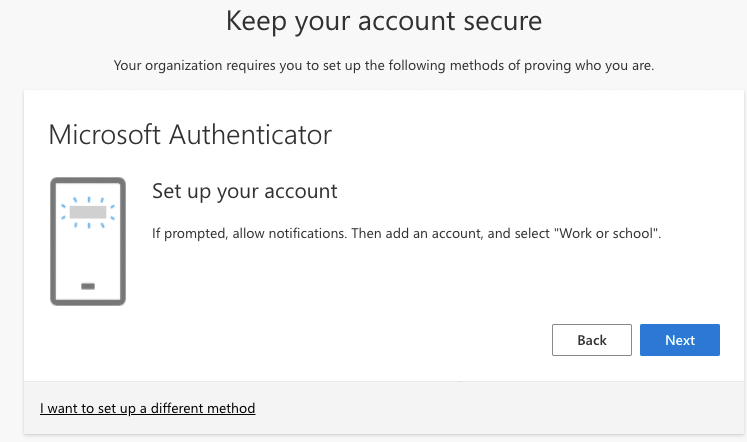
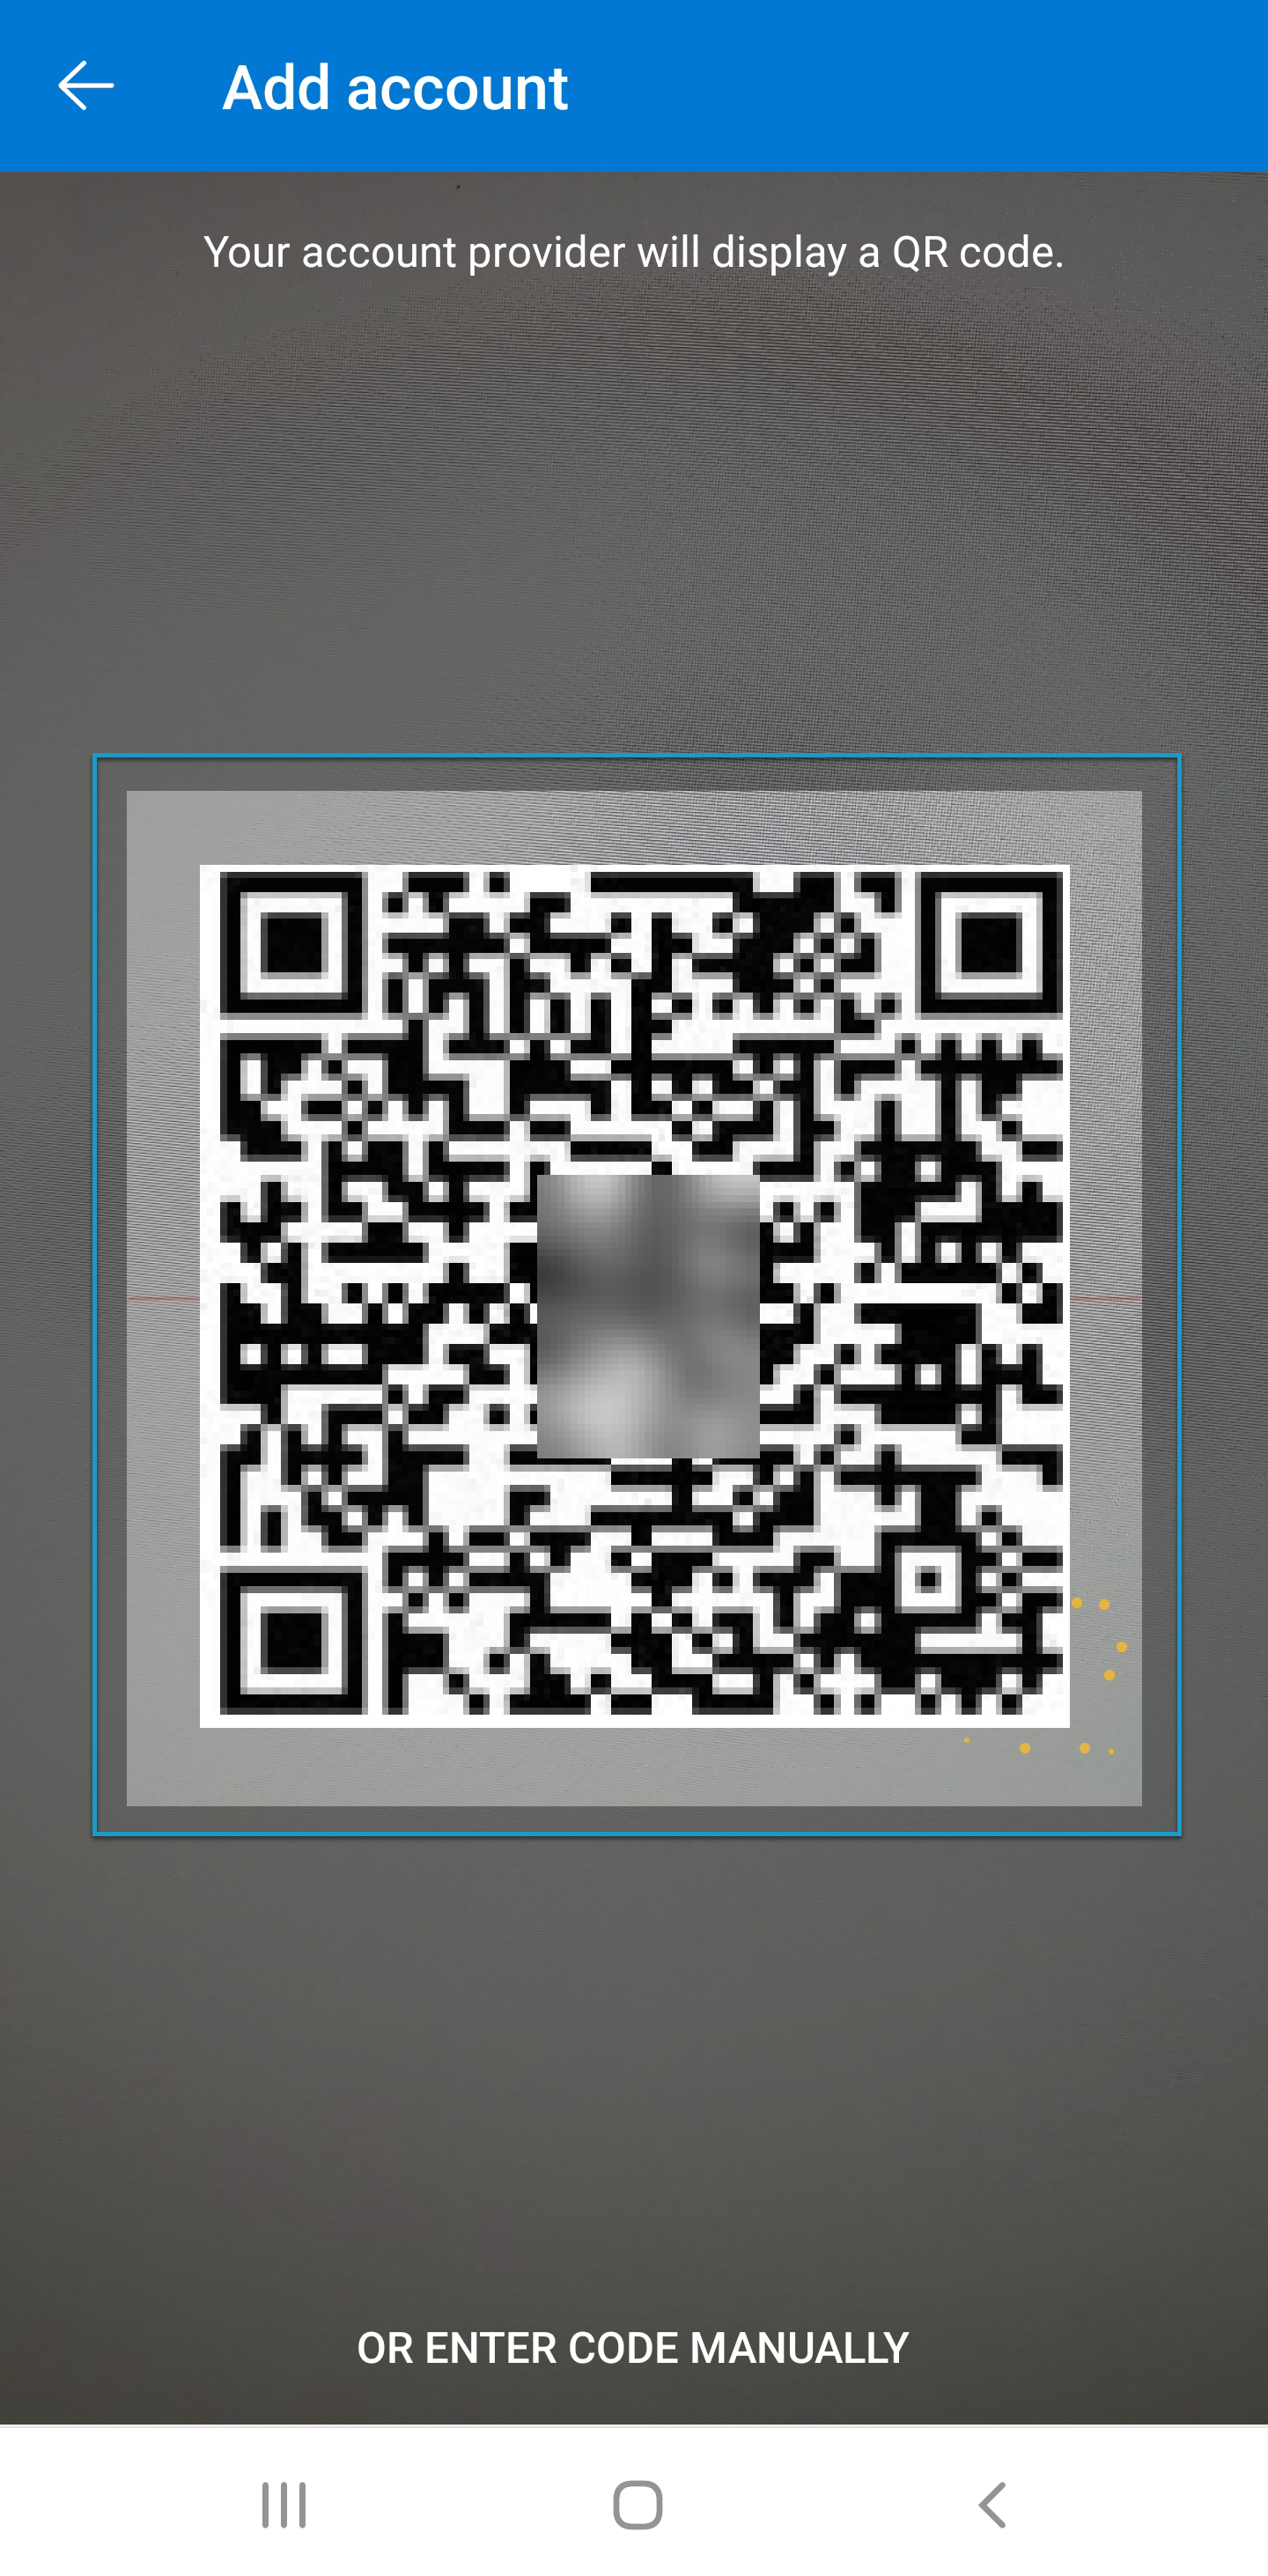
Click next again and you will be prompted with a QR code. Move to your phone at this point!
On your phone, open the Microsoft Authenticator app.
When you download and open the Microsoft Authenticator you may be prompted to unlock your phone. This PIN or Biometric prompt would have already been set up on your device.
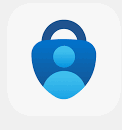
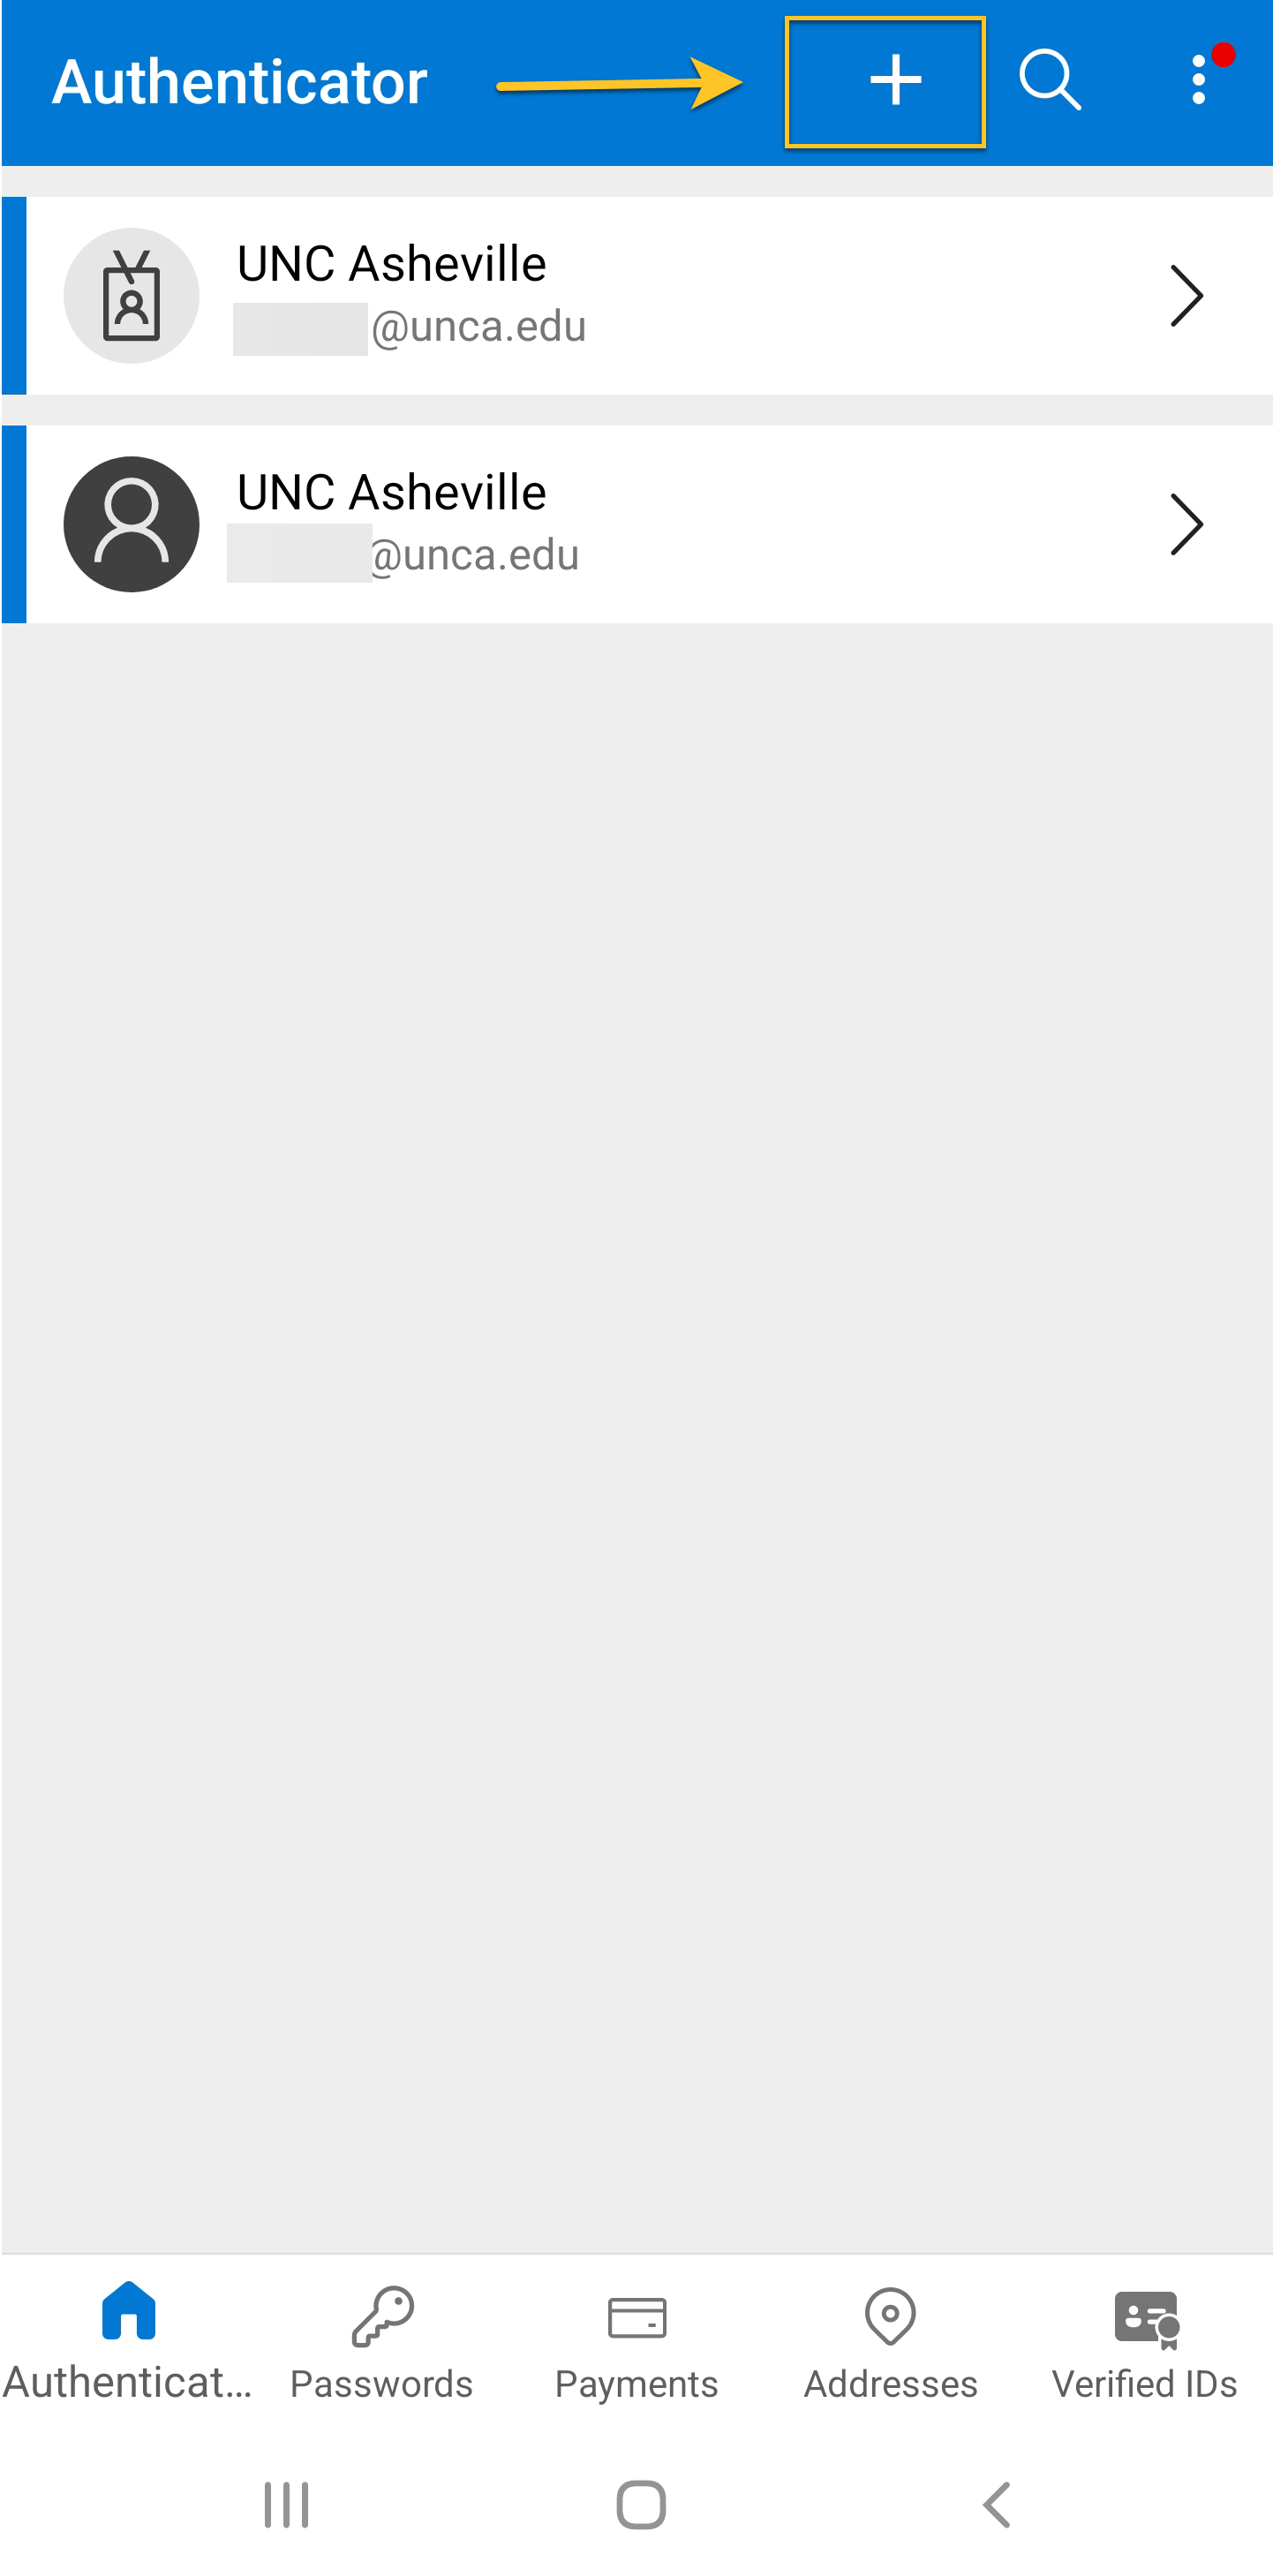
You will see the + button at the top to add an account.
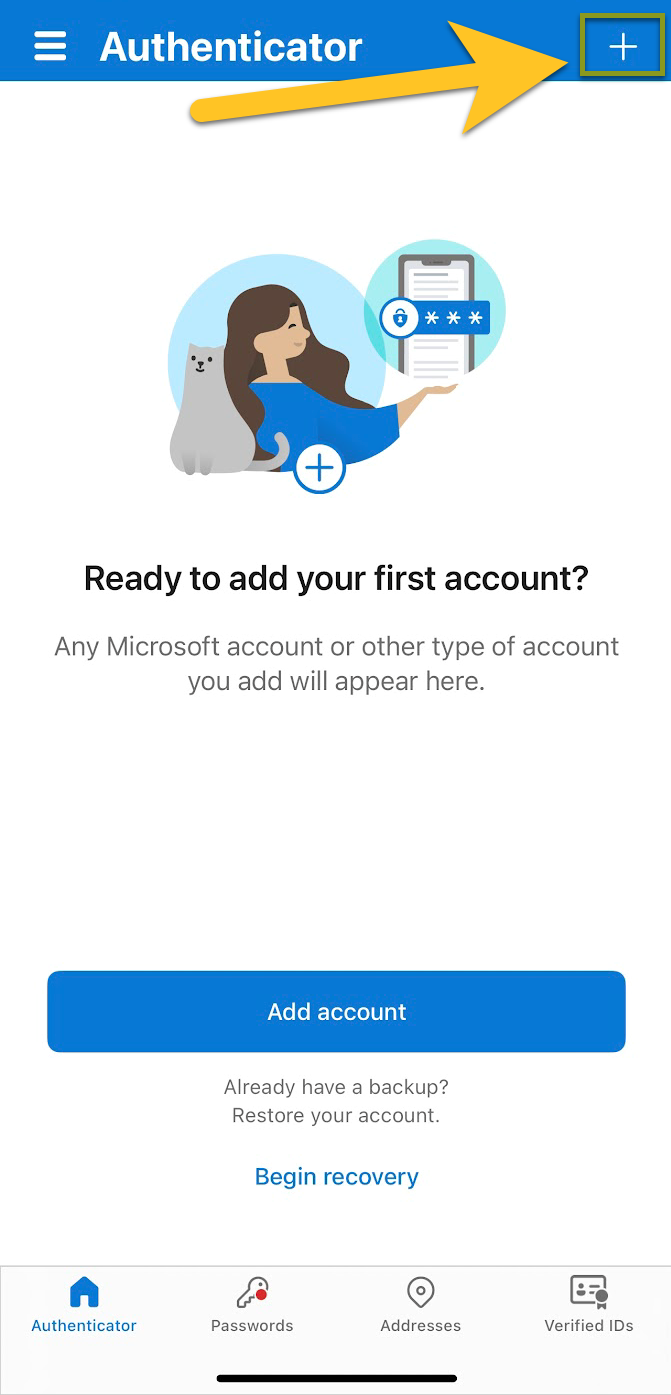
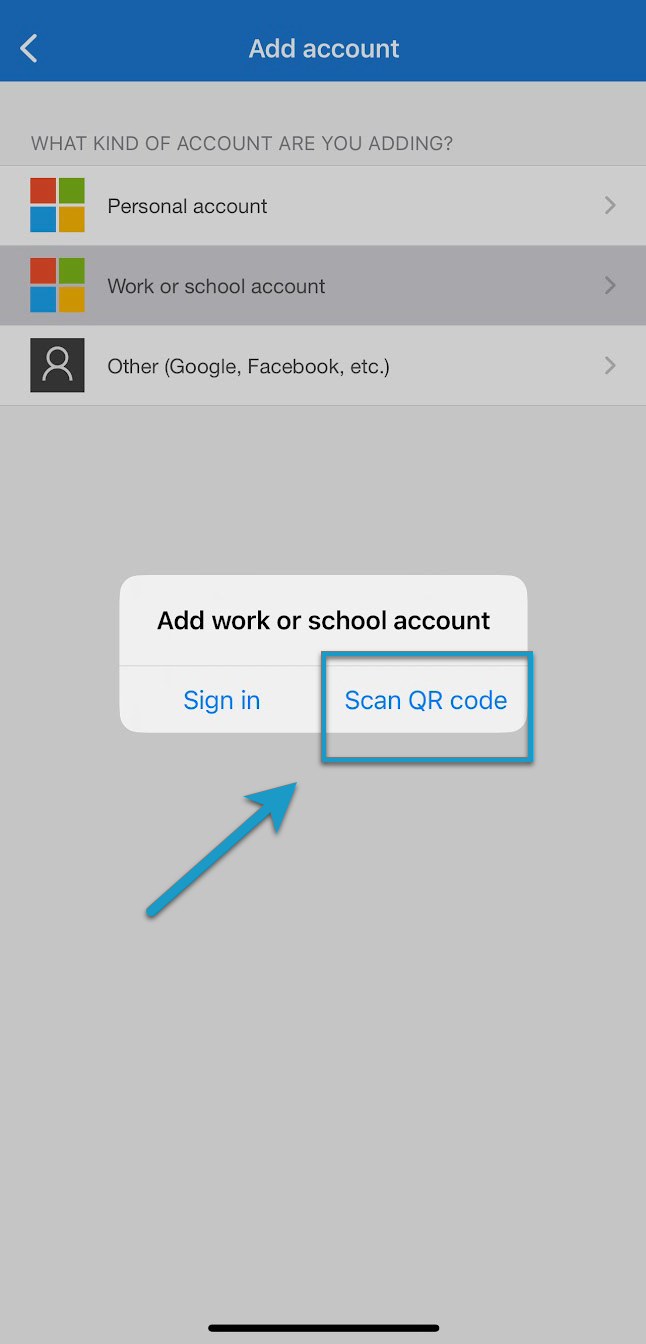
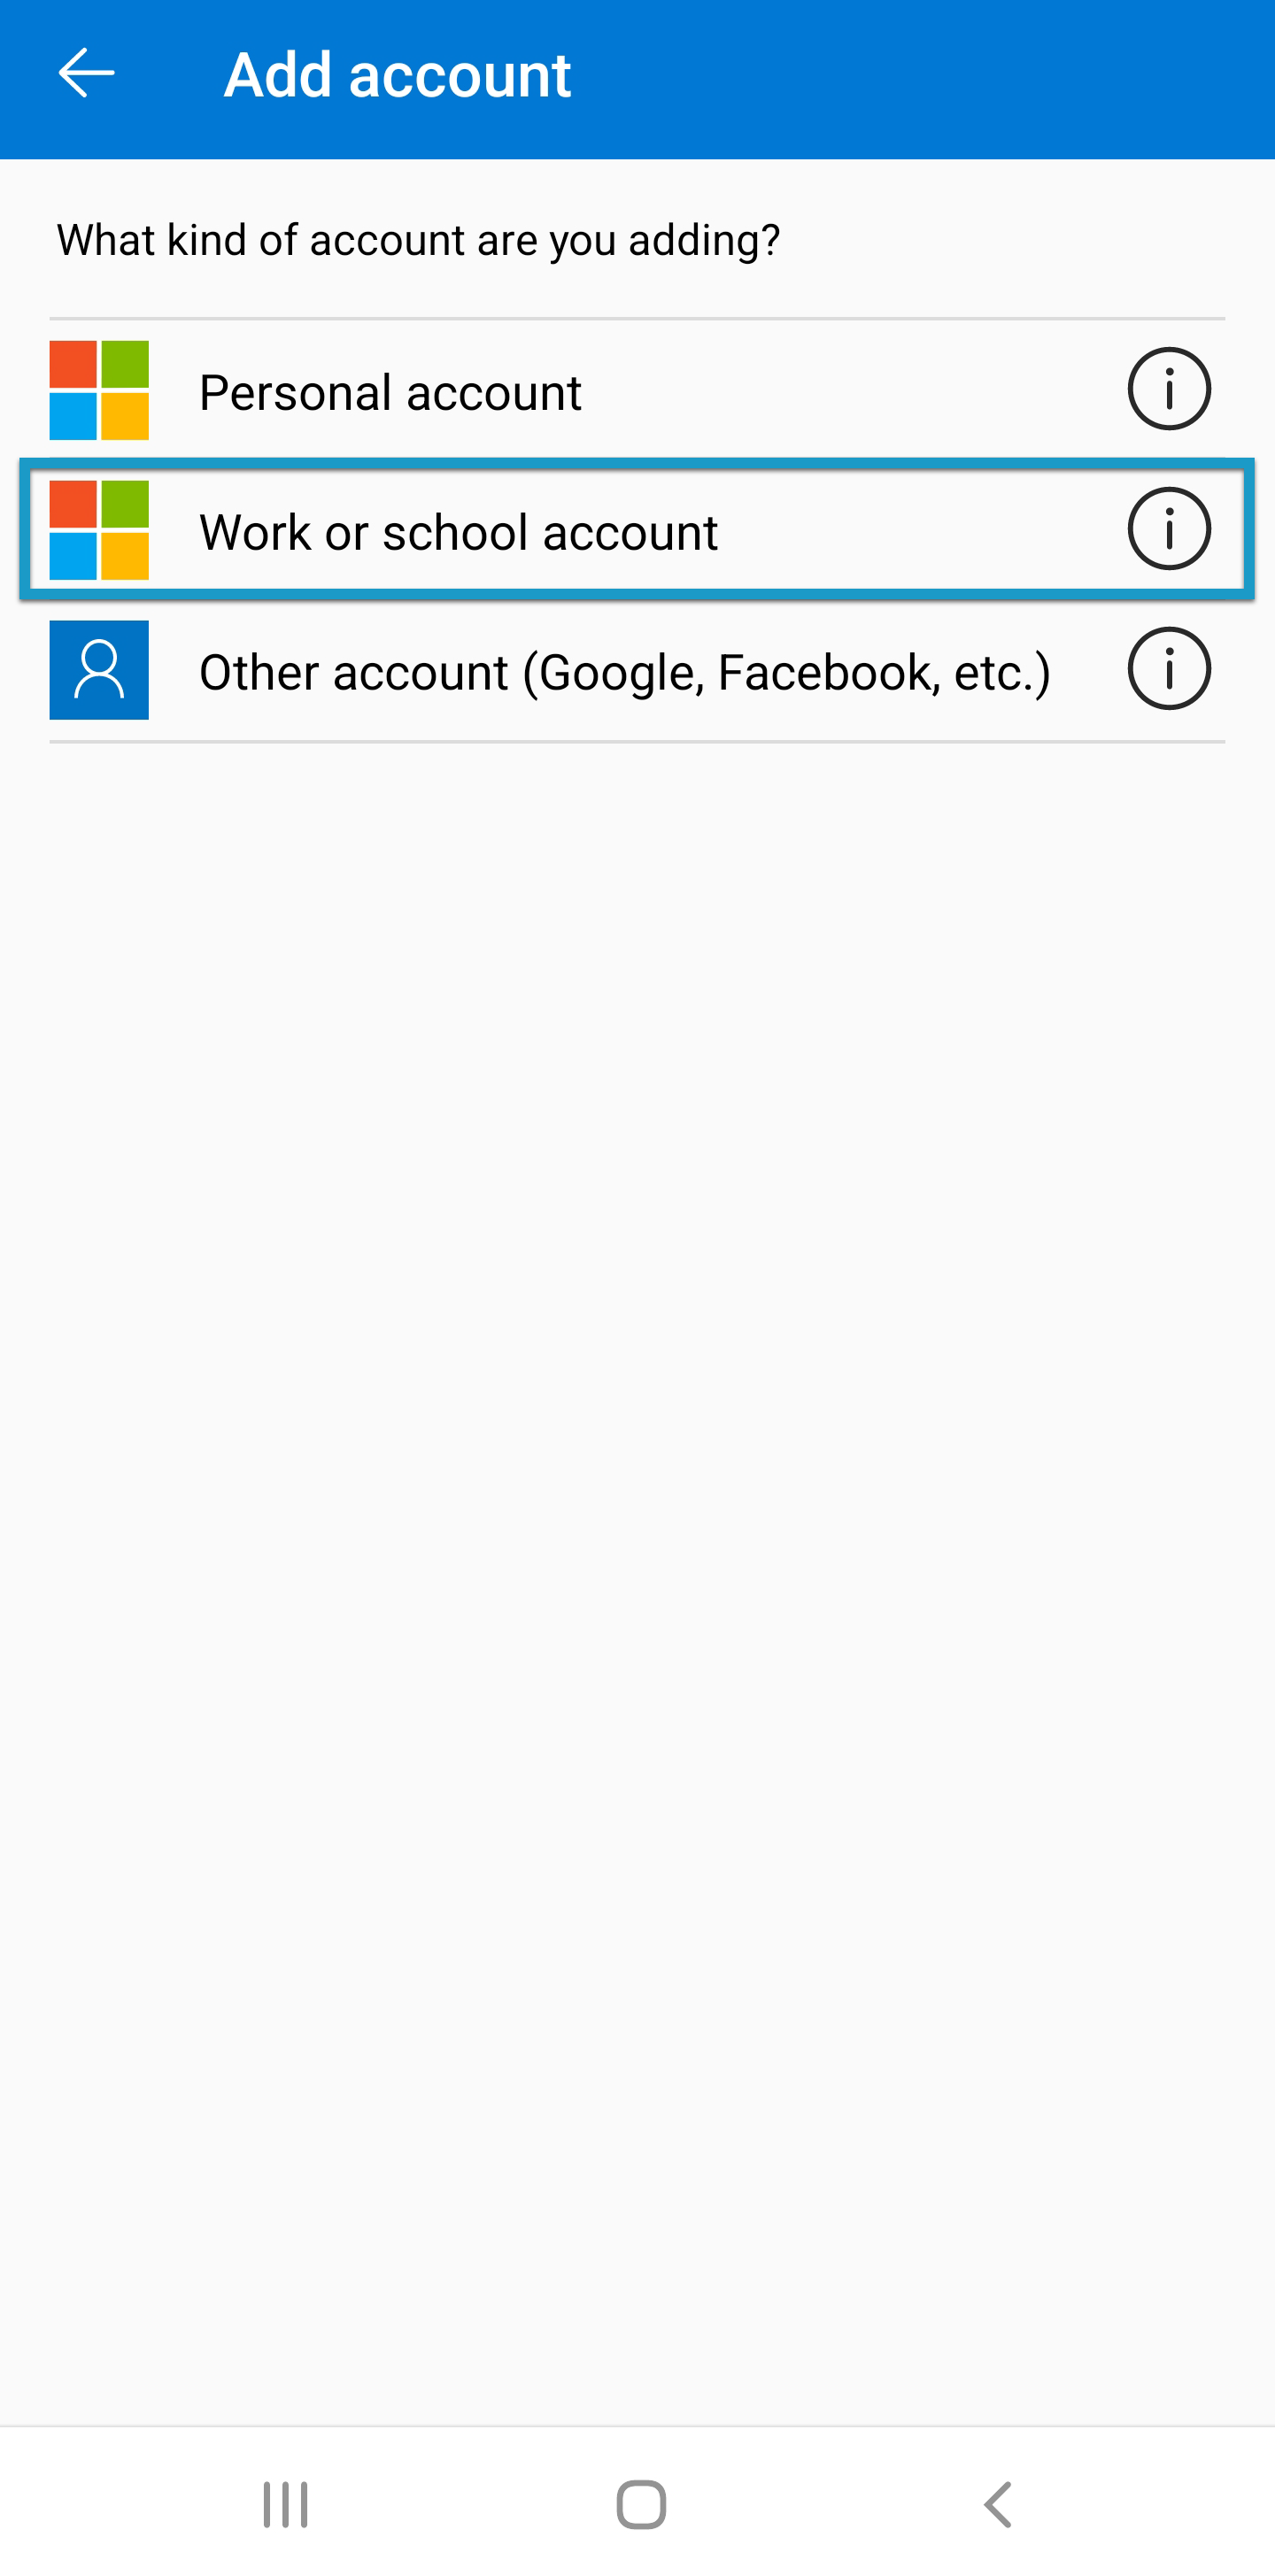
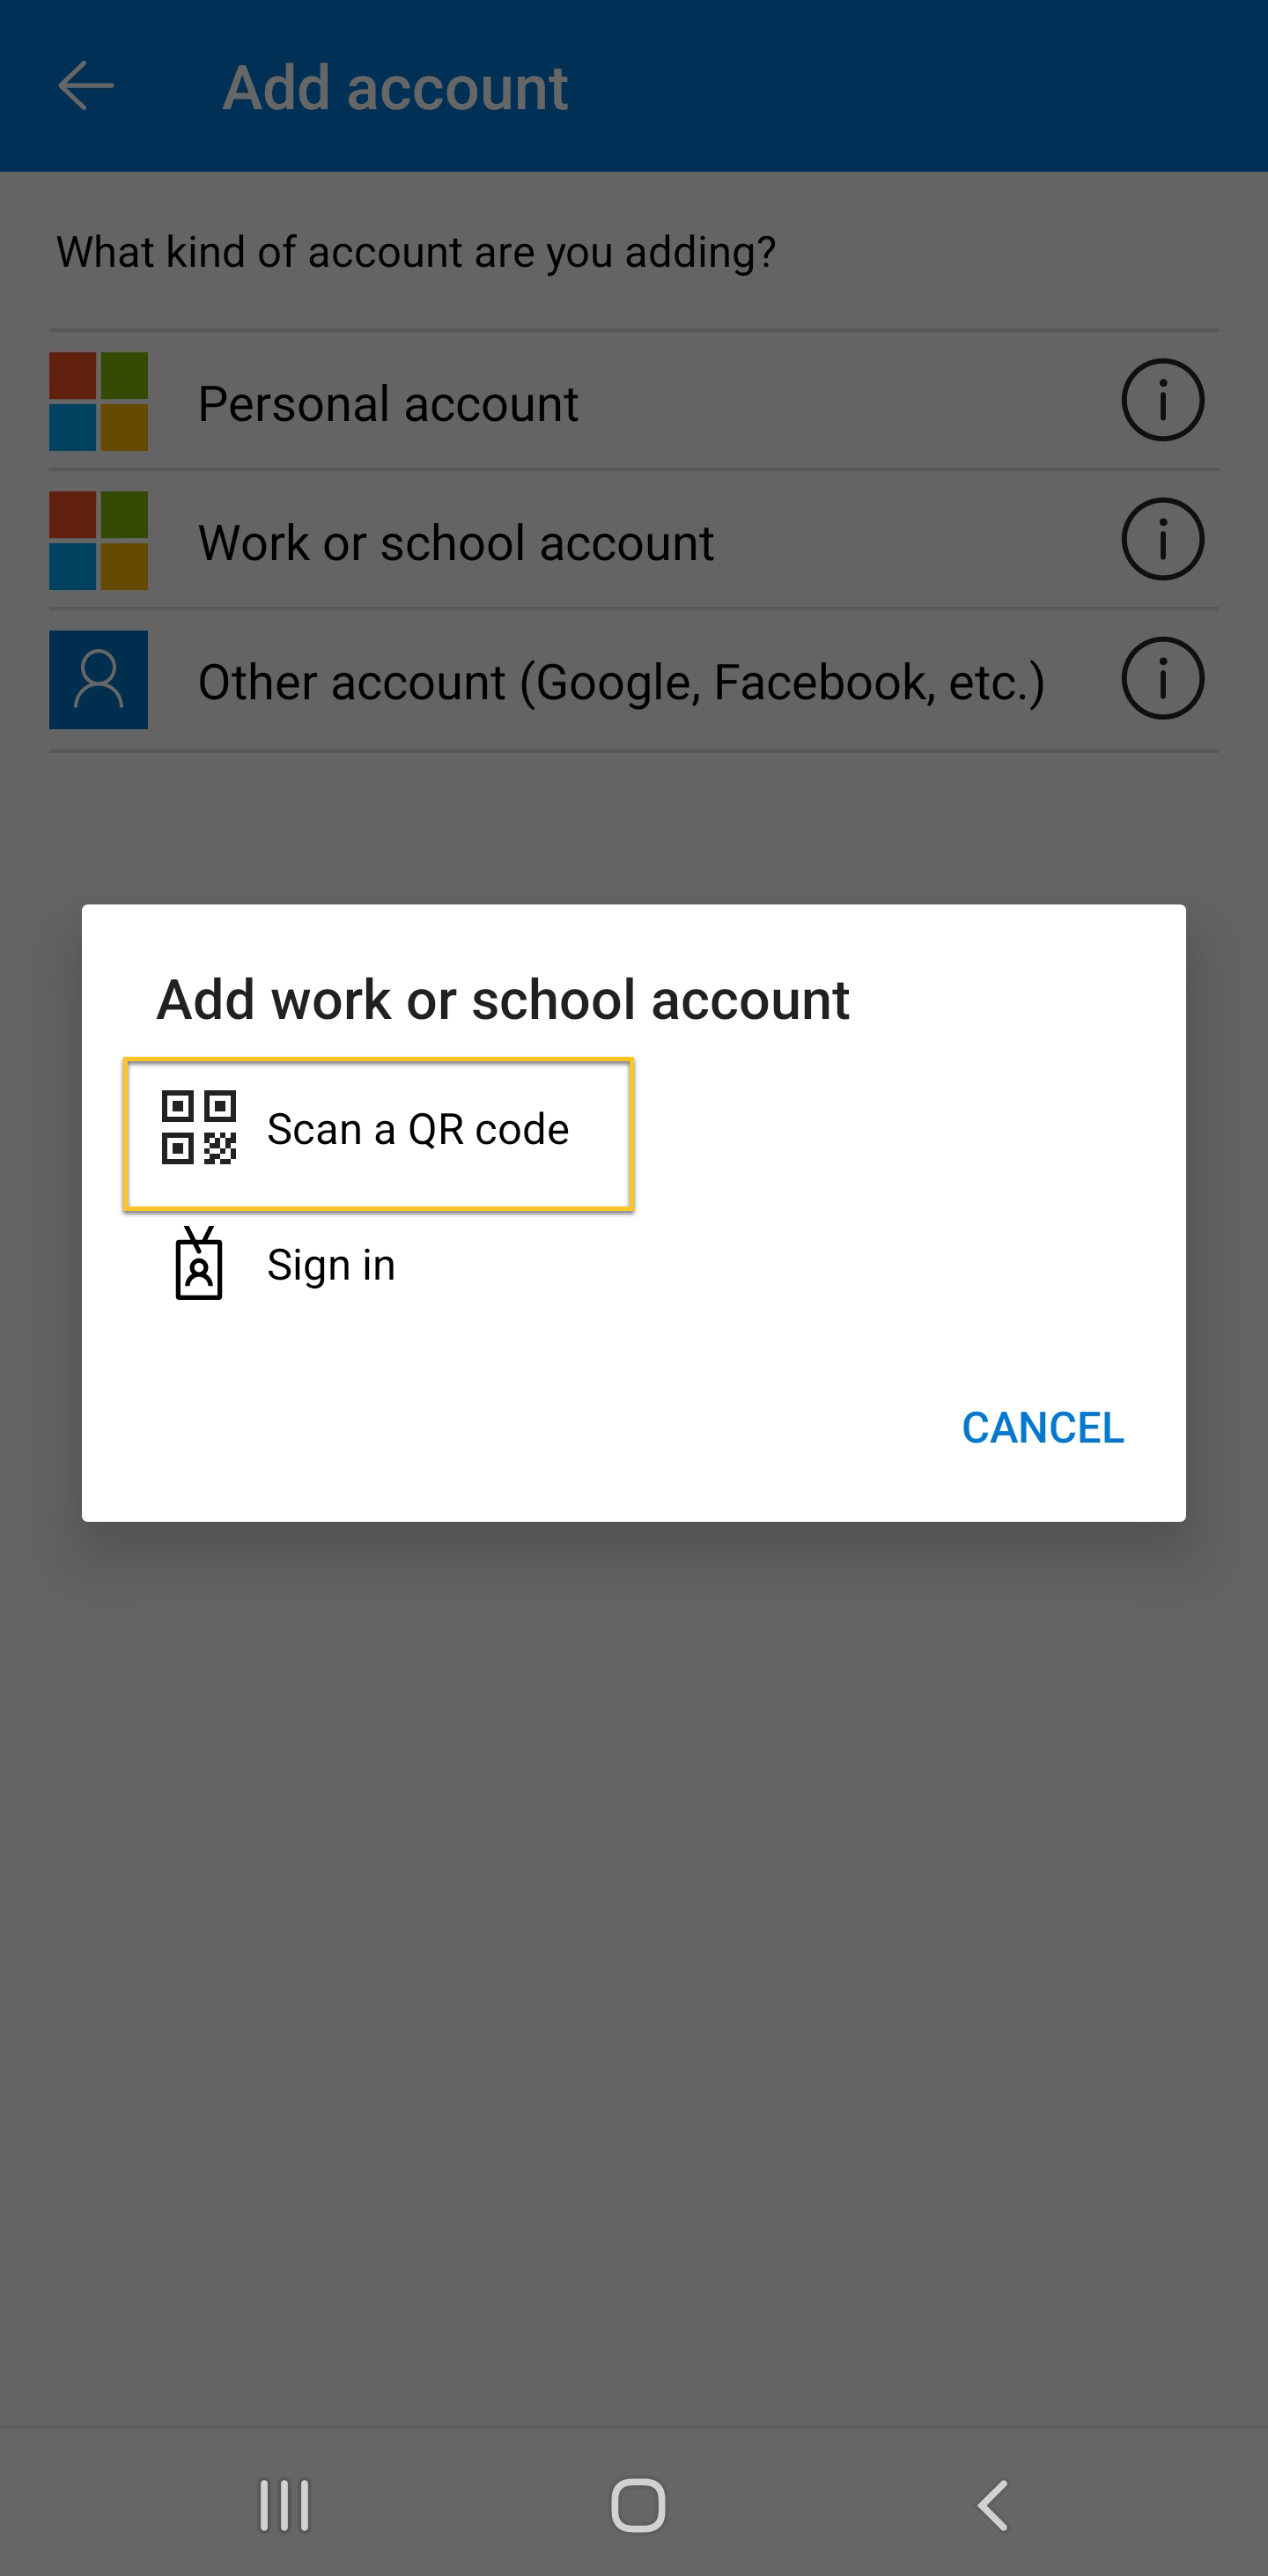
Ensure that you are adding a Work or School account.
Then begin the QR code scanning process by clicking on the Scan QR code option. If prompted, allow the app to use your camera!
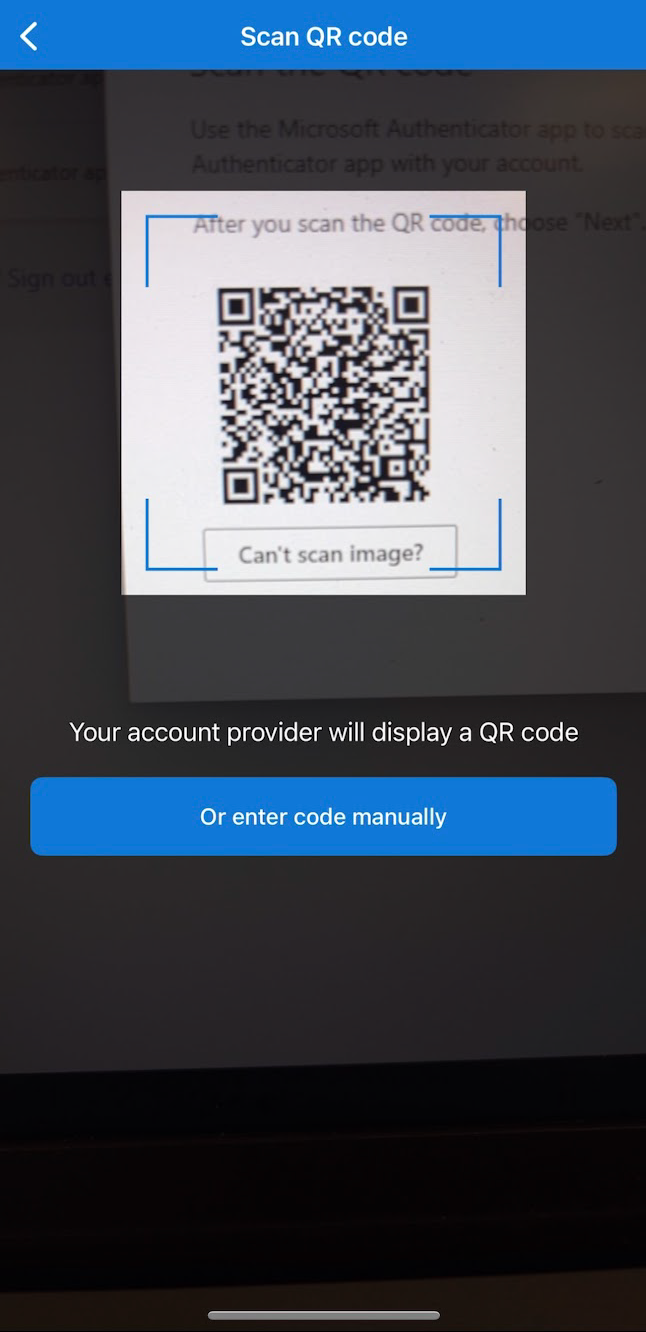
Using the Microsoft Authenticator app, scan the QR code presented on the computer screen.
On the computer: This will provide you an activation code for the app.
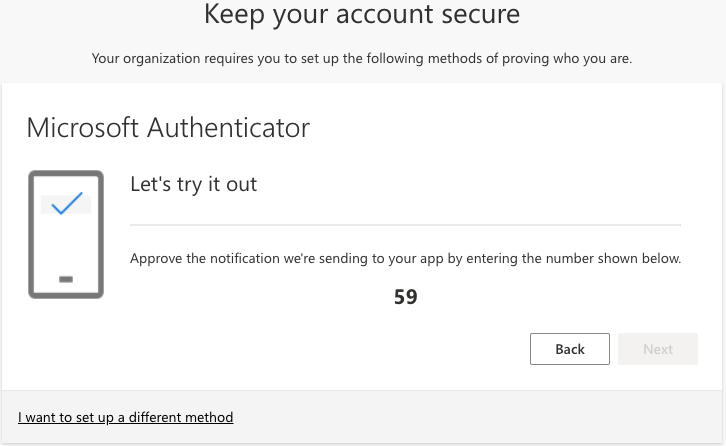
On the phone: Enter the code on your phone when prompted. If not prompted follow the steps on allowing notifications for the Microsoft Authenticator app.

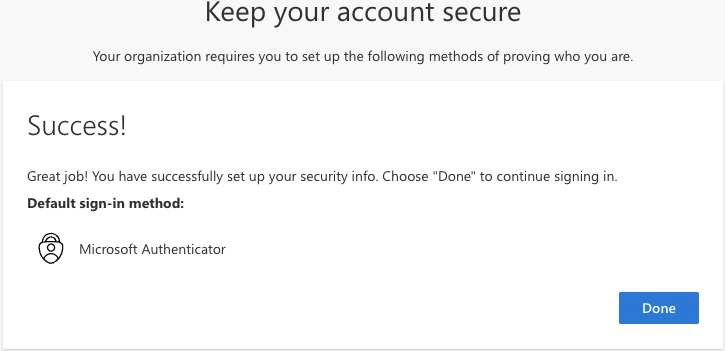
On the computer: You will see a verification.
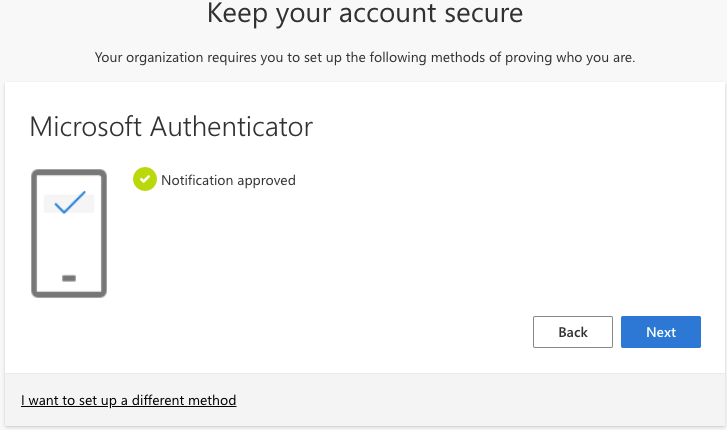
Once verified you will see a success notification.
Android
On your phone: Android download click HERE
Click Install and allow any prompts that may occur during the install of the app.
On your computer: After picking “Authenticator App” from the dropdown, the next window will ask if you would prefer to use the Microsoft Authenticator. This application will allow your phone to authorize access to your accounts.
Click Next to begin setup.
Click next again and you will be prompted with a QR code. Move to your phone at this point!
On your phone, open the Microsoft Authenticator app.
When you download and open the Microsoft Authenticator you may be prompted to unlock your phone. This PIN or Biometric prompt would have already been set up on your device.
You will see the + button at the top to add an account.
Ensure that you are adding a Work or School account.
Then begin the QR code scanning process by clicking on the Scan QR code option. If prompted, allow the app to use your camera!
Using the Microsoft Authenticator app, scan the QR code presented on the computer screen.
On the computer: This will provide you an activation code for the app.
On the phone: Enter the code when prompted. If not prompted follow the steps on allowing notifications for the Microsoft Authenticator app.
On the computer: You will see a verification.
Once verified you will see a success notification.
Phone Call / Text
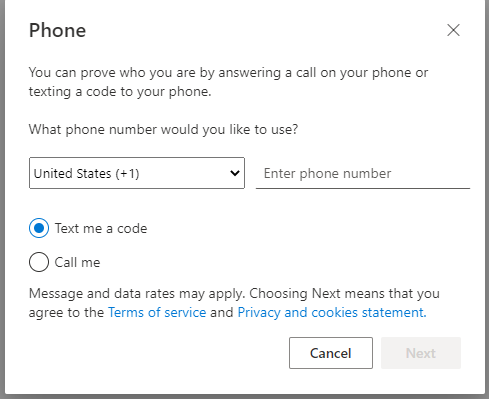
Choose your area code, enter your phone number, and select the verification method.
The system will now call or text you based on your selection. Follow the prompts to complete the MFA method registration.
Upon authentication you will receive a call and be prompted to press # to verify your identity.
Browser Extension
Use our guide for the Authenticator.cc browser extension in Chrome for easy access without a phone!
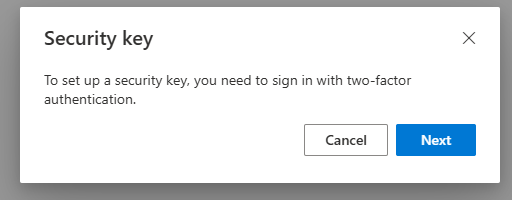
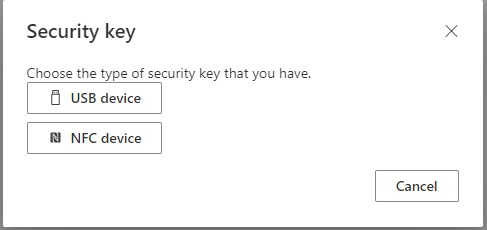
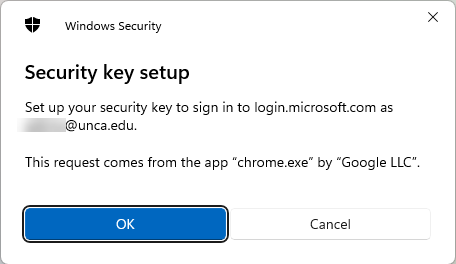
Security Key
You may be prompted to authenticate with MFA right away.
Pick the type of hardware token you wish to use. USB and NFC type devices are both supported.
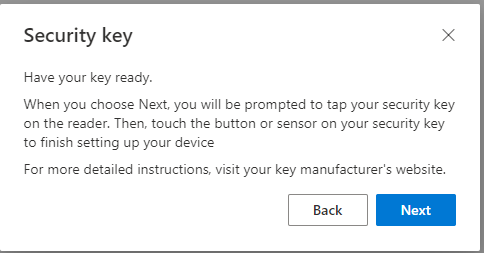
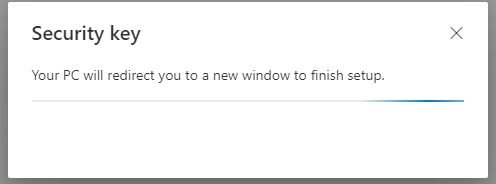
With your security key in hand, follow the prompts to complete the MFA method registration.
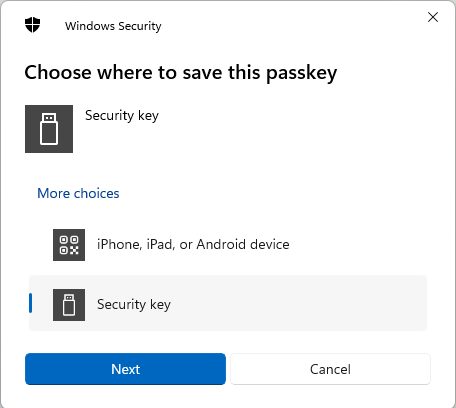
Pick the Security Key option
Confirm the prompt
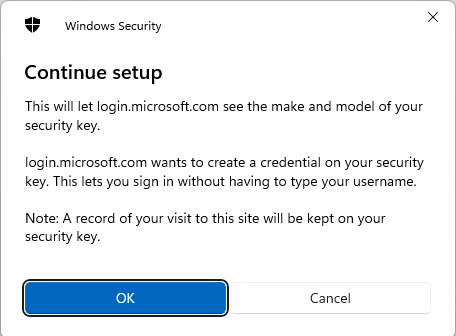
Confirm the details of using a physical security key
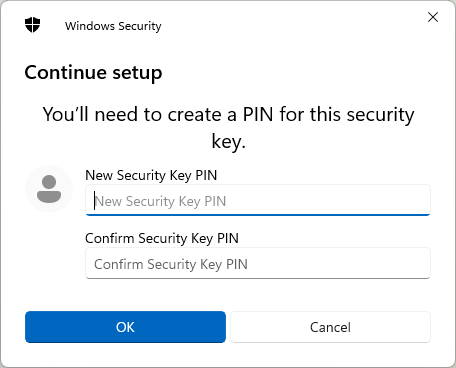
Create a PIN
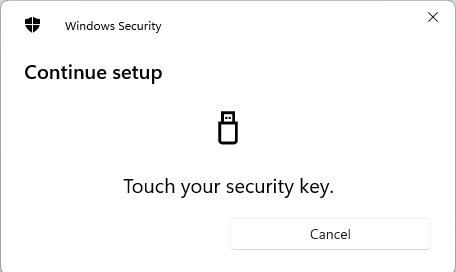
Now you will need to press the flashing button on the physical key
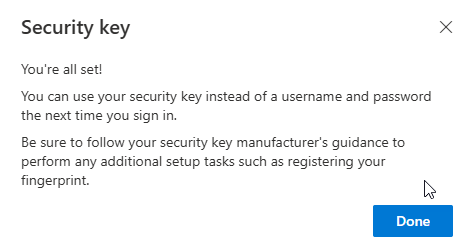
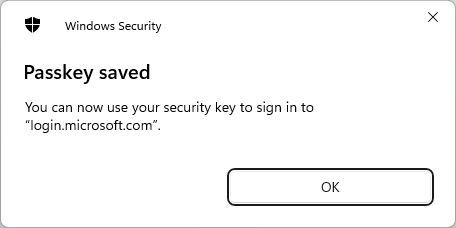
The Passkey is now saved to the physical key
Be sure to give the key a memorable name, and you have completed the process!