.png)
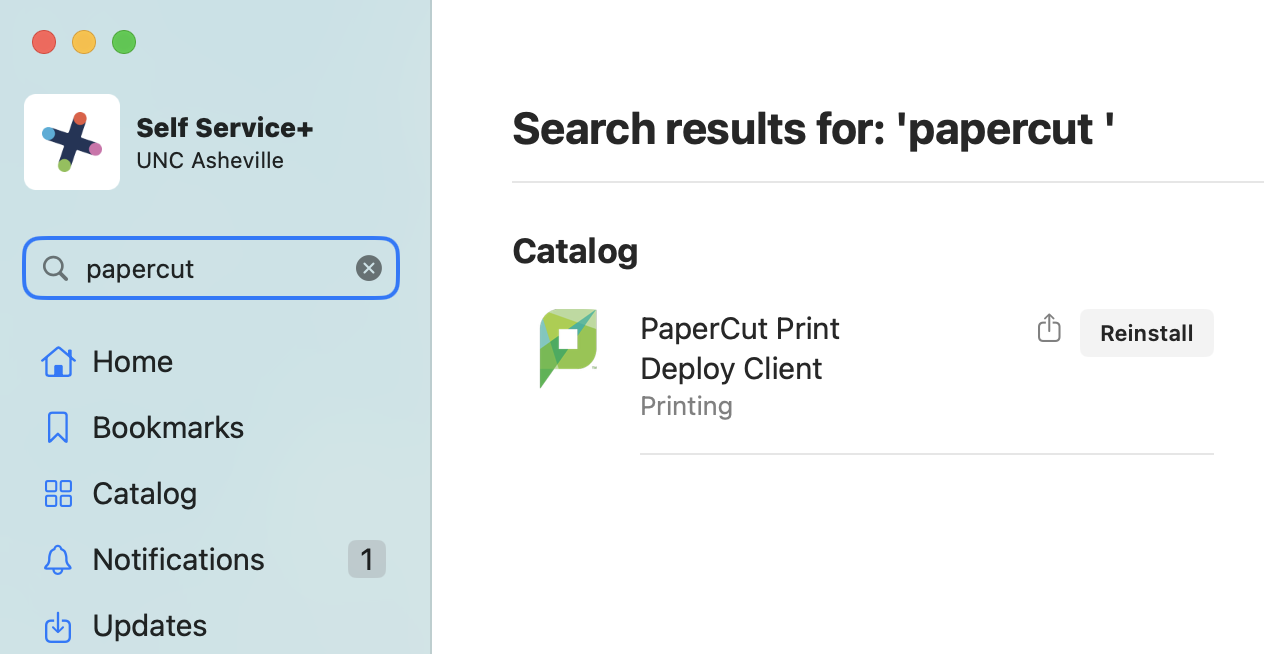
In order to install the FindMePrinting client on your computer you will first need to open Self Service + from the Dock

Once in “Self Service +” use the search near the top left and search for PaperCut
Click Install for the green PaperCut logo to begin the process.
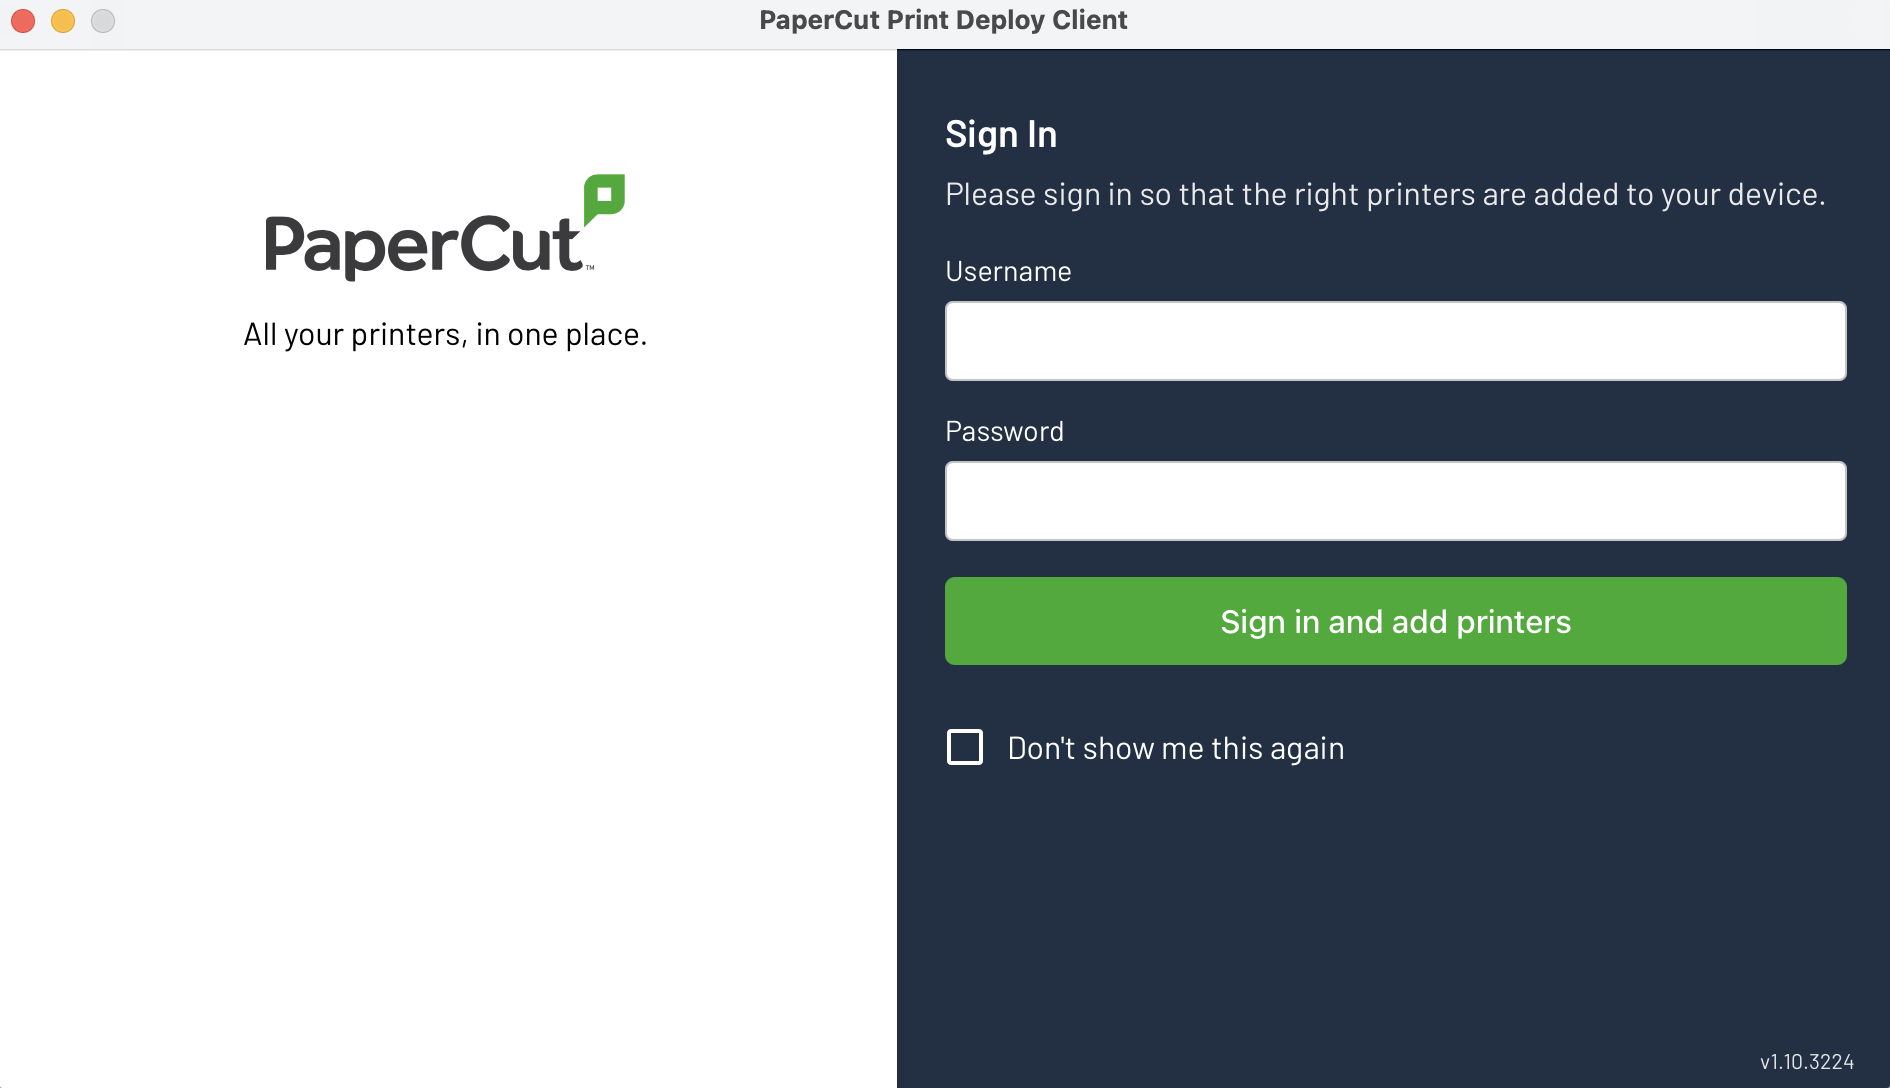
You will see a popup from the PaperCut client. Sign in with your UNCA username and password
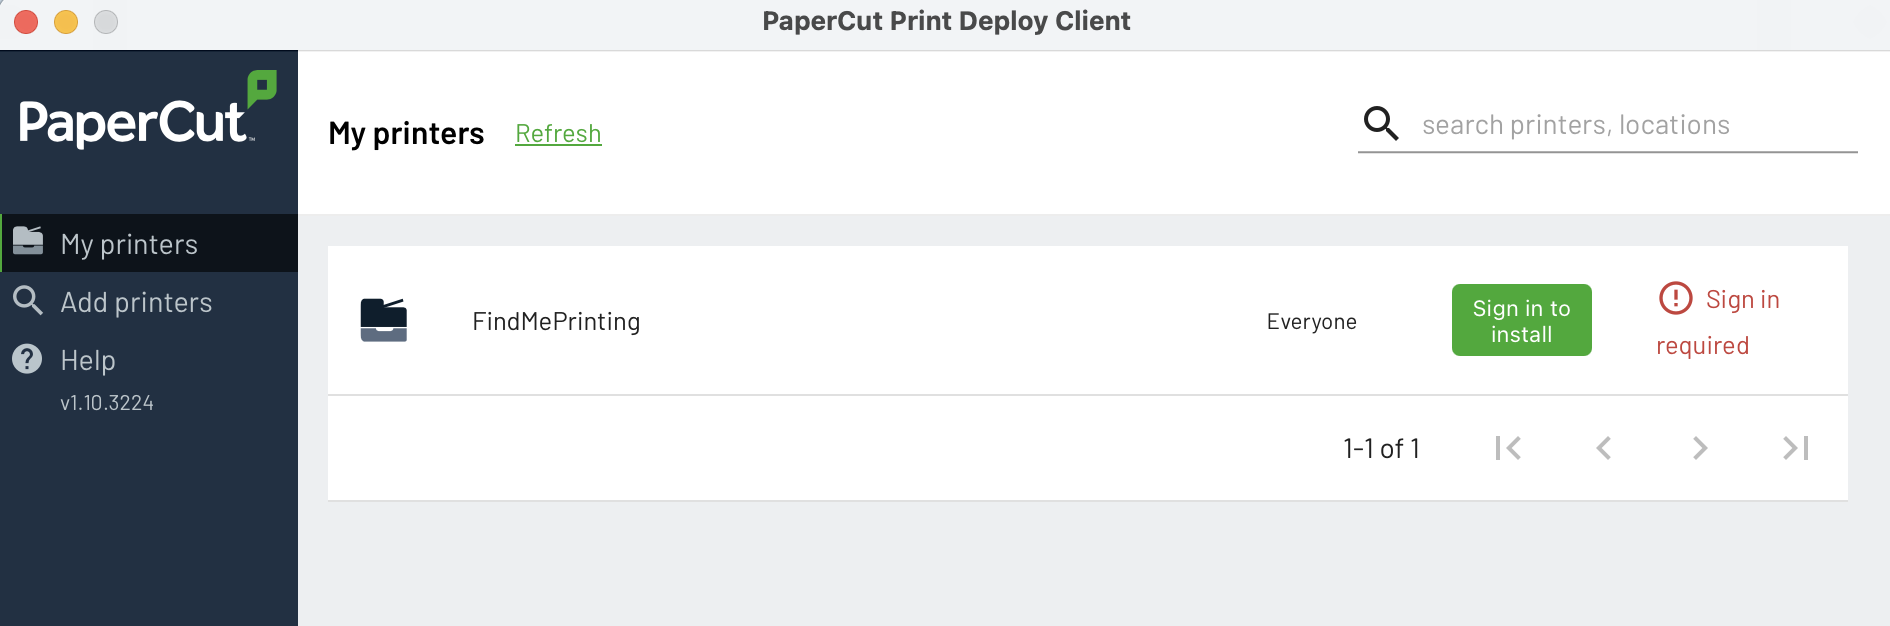
The list of printers will appear with FindMePrinting in the list. Click Install on the right hand side to add the printer to your Mac.
You may see a popup about needing to sign-in. If so, please use your UNCA username and password.
Verify the printer install by opening System Settings, scrolling down on the left hand menu, and clicking Printers and Scanners.
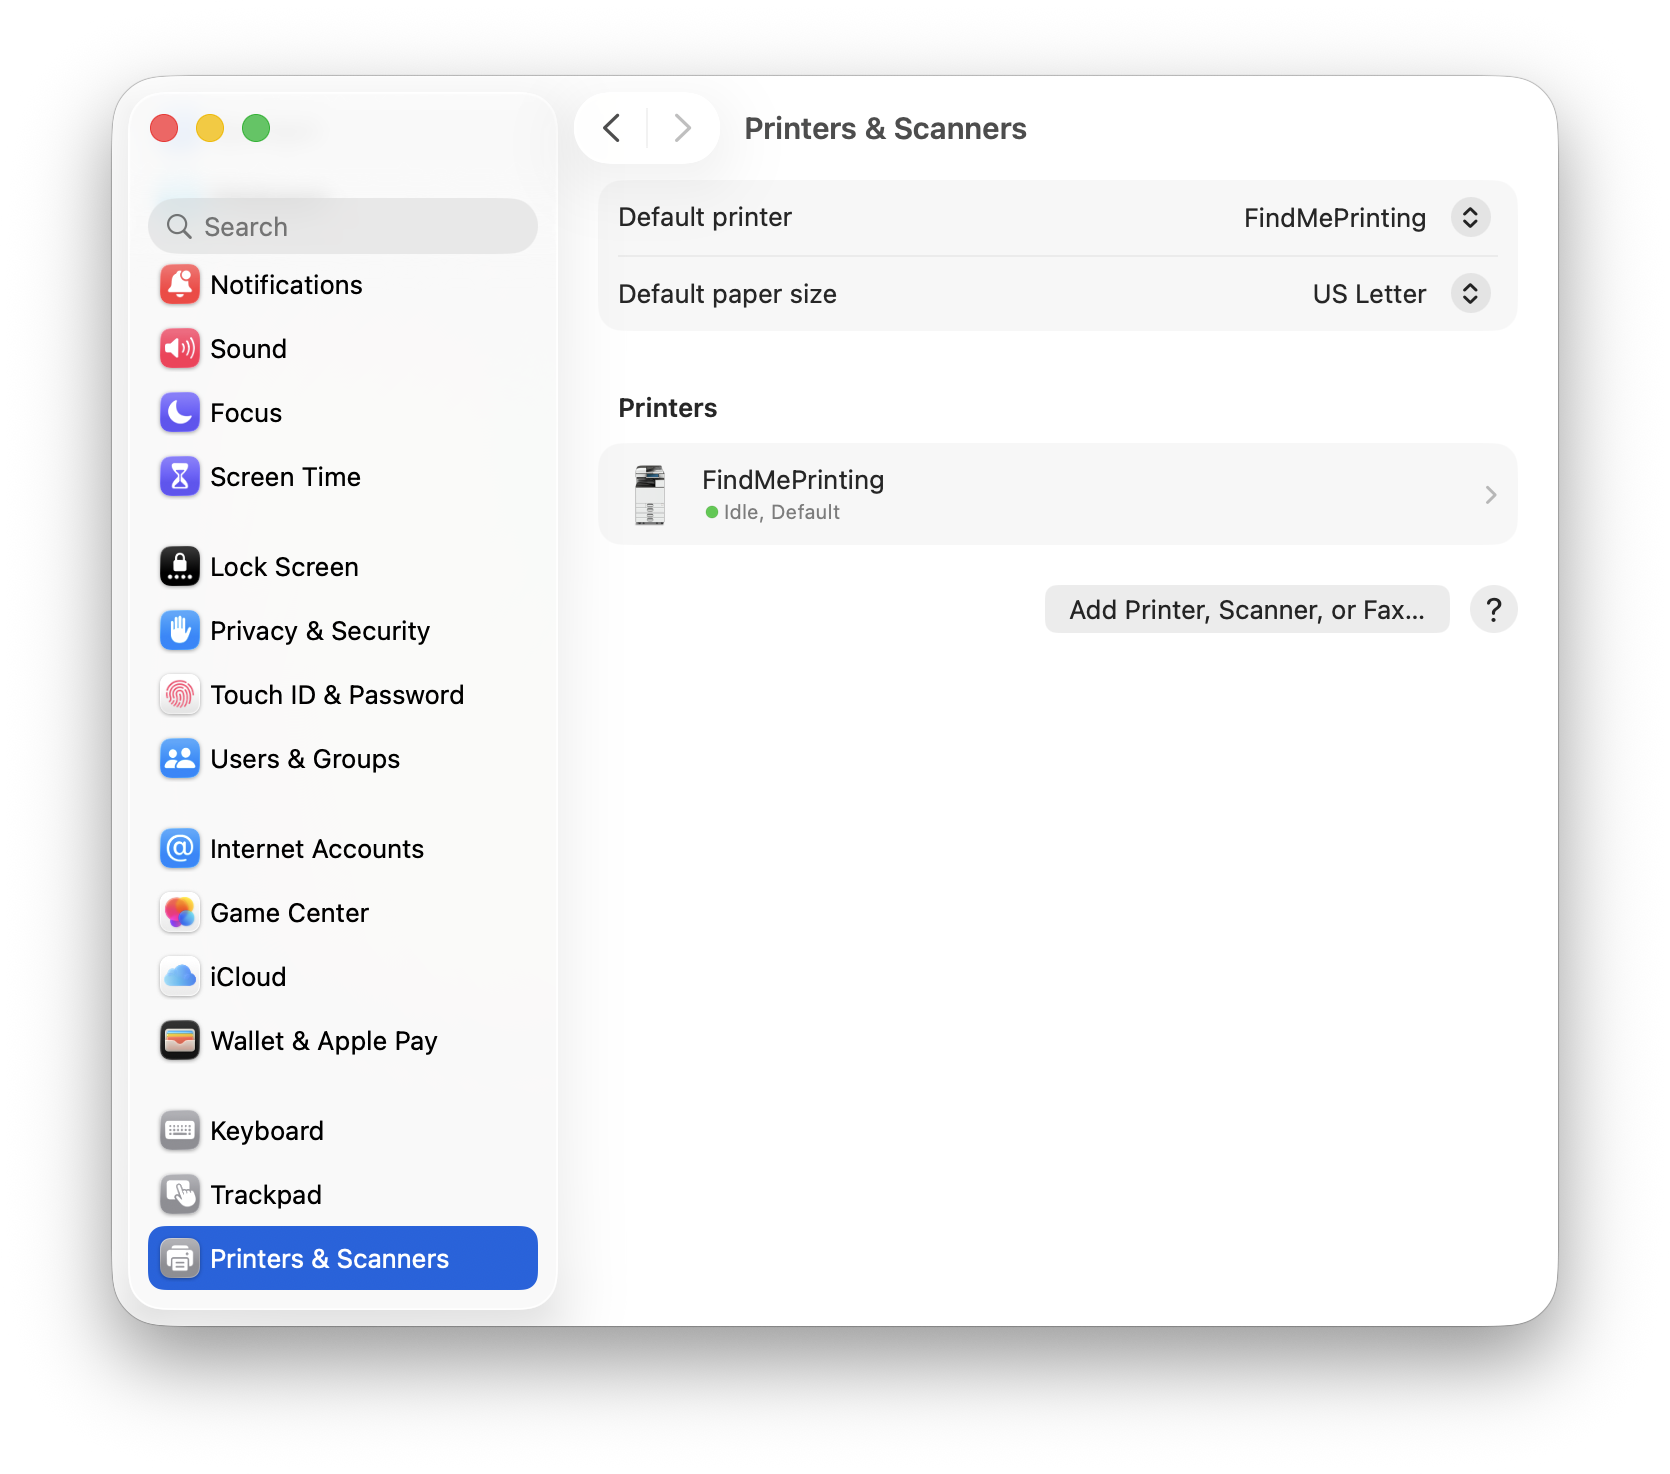
FindMePrinting should be listed. You are now ready to print to the RICOH campus printer fleet
Note: Once the PaperCut client is installed, you may need to follow the instructions for Faculty/Staff Multiple Fund and Student Worker Printing.
For advanced functions and finish features, please take a look at this article!